How To Take Apart Xbox Elite Series 2 Controller - Remove the 2 t6 torx screws (yellow circle) and gently slide the motherboard up along the two dowel pins (red circle). Insert one of the joystick caps to. Insert one of the joystick.
Insert one of the joystick. Insert one of the joystick caps to. Remove the 2 t6 torx screws (yellow circle) and gently slide the motherboard up along the two dowel pins (red circle).
Insert one of the joystick caps to. Insert one of the joystick. Remove the 2 t6 torx screws (yellow circle) and gently slide the motherboard up along the two dowel pins (red circle).

You can now customize your Xbox Elite Series 2 controller Digital Trends
Insert one of the joystick. Insert one of the joystick caps to. Remove the 2 t6 torx screws (yellow circle) and gently slide the motherboard up along the two dowel pins (red circle).
Serious Discussion Xbox Elite Series 2 Wireless Controller is now
Insert one of the joystick caps to. Insert one of the joystick. Remove the 2 t6 torx screws (yellow circle) and gently slide the motherboard up along the two dowel pins (red circle).
/xboxonecontrollerapart-2abb3151f1f84106ae88ebb97e705b9c.jpg)
How to Take Apart an Xbox One Controller
Insert one of the joystick. Insert one of the joystick caps to. Remove the 2 t6 torx screws (yellow circle) and gently slide the motherboard up along the two dowel pins (red circle).
Xbox Elite Wireless Controller Series 2 Core
Remove the 2 t6 torx screws (yellow circle) and gently slide the motherboard up along the two dowel pins (red circle). Insert one of the joystick caps to. Insert one of the joystick.

Xbox Elite 2 “Core” Controller Comes with Less Goodies, but a Nicer Price
Insert one of the joystick caps to. Remove the 2 t6 torx screws (yellow circle) and gently slide the motherboard up along the two dowel pins (red circle). Insert one of the joystick.

eXtremeRate Replacement Bottom Shell Case for Xbox Elite Series 2
Remove the 2 t6 torx screws (yellow circle) and gently slide the motherboard up along the two dowel pins (red circle). Insert one of the joystick. Insert one of the joystick caps to.
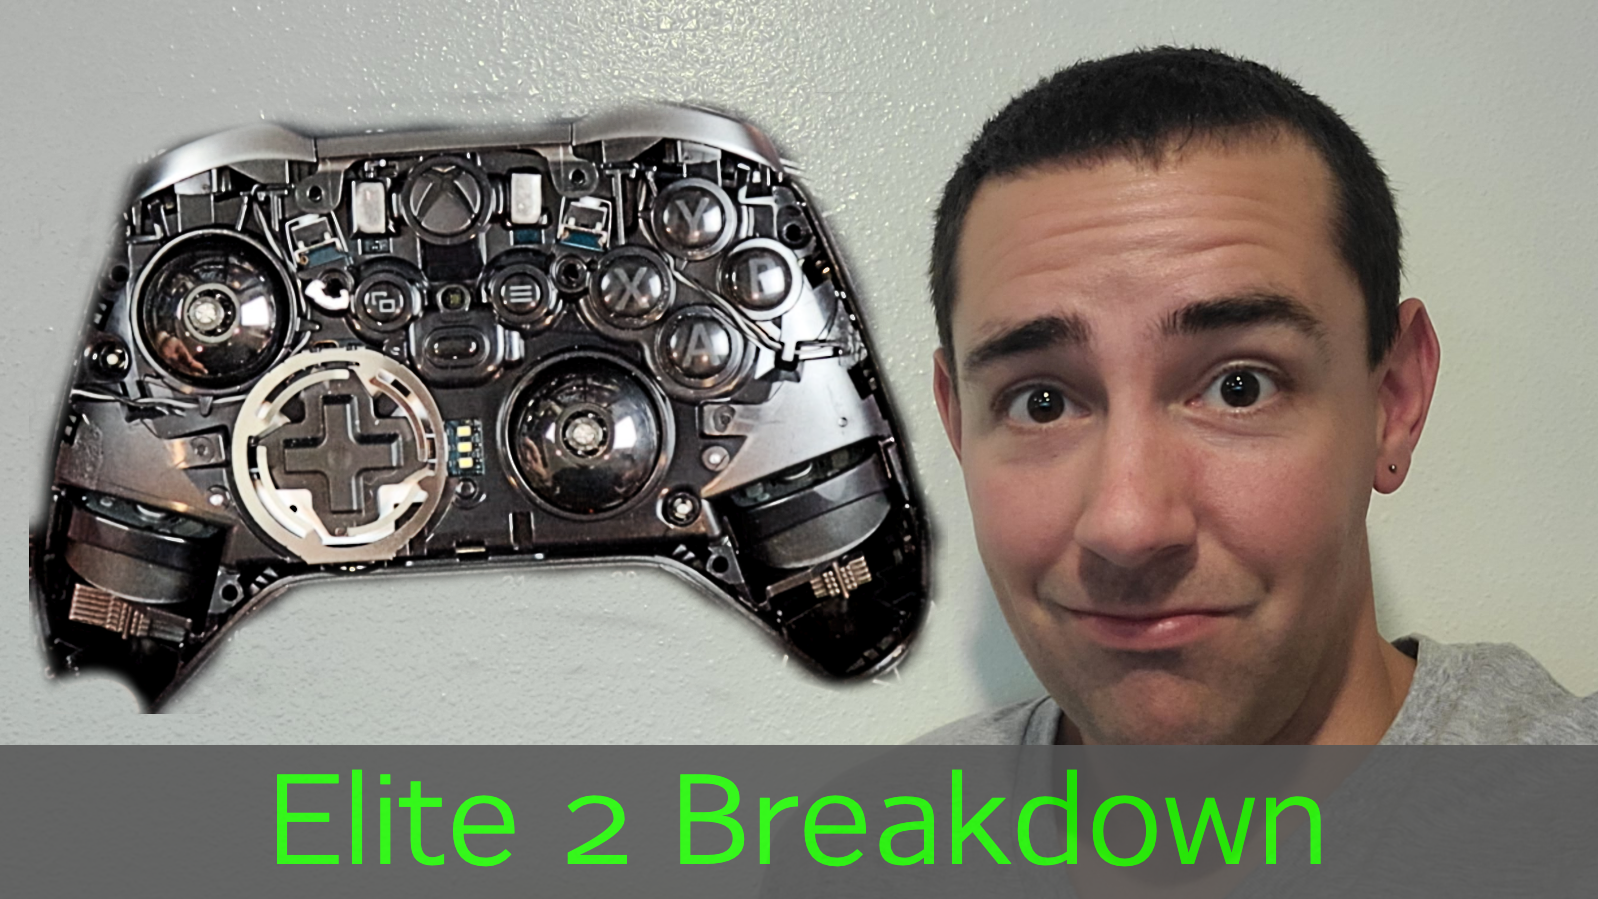
Xbox Elite Series 2 Controller Take Apart & Fix
Insert one of the joystick. Remove the 2 t6 torx screws (yellow circle) and gently slide the motherboard up along the two dowel pins (red circle). Insert one of the joystick caps to.

Xbox Elite Wireless Controller Series 2 GameAccess
Insert one of the joystick caps to. Remove the 2 t6 torx screws (yellow circle) and gently slide the motherboard up along the two dowel pins (red circle). Insert one of the joystick.

How to Take Apart Xbox One Controller Imautomator
Insert one of the joystick caps to. Remove the 2 t6 torx screws (yellow circle) and gently slide the motherboard up along the two dowel pins (red circle). Insert one of the joystick.
Xbox Elite Wireless Controller Series 2 Core
Insert one of the joystick caps to. Insert one of the joystick. Remove the 2 t6 torx screws (yellow circle) and gently slide the motherboard up along the two dowel pins (red circle).
Remove The 2 T6 Torx Screws (Yellow Circle) And Gently Slide The Motherboard Up Along The Two Dowel Pins (Red Circle).
Insert one of the joystick. Insert one of the joystick caps to.